How To Improve Your Conditioning

One of the biggest issues people have when trying to improve their conditioning is they look at it through a different lens than strength training.


Most people understand that you can progress strength training by increasing weight, increasing reps or increasing the number of sets of a given exercise.


When it comes to conditioning though, most people take the approach of just working really hard until they get tired.


How do you improve that? Say it with me…work harder and longer!


Except that’s completely wrong.


The problem with that way of thinking is that it WILL make you more tired…but it rarely improves your conditioning.


We can effectively improve conditioning by taking the same approach as we typically do with strength training.


Here are the top 3 ways to improve your conditioning:


Increasing Conditioning Volume

When you increase the volume of your conditioning training, you are in fact increasing the training stress on your body. Gradual increases in stress on the body is what stimulates the positive changes you’re working towards.

You can increase your conditioning volume by:

  • Increasing the time of your conditioning sessions each week
  • Increasing the sets of your conditioning exercises each week

It’s important to increase your conditioning volume gradually over the course of your training block (typically 4 to 6 weeks). This allows your body to effectively recover to an increased workload without injury.


For example, let’s say you’ve decided to begin walking at a brisk pace. Ideally you want to find a pace (above 3.5 mph) where you can keep your heart rate between 120 and 130 beats per minute. In week 1, you would take a brisk walk 3 times per week for 20 minutes at your targeted pace. In week 2, you would increase your walk time to 25 minutes for your 3 sessions. In week 3, your time would again increase to 30 minutes and in week 4 you’re bumping your walk time to 35 minutes.

Now that you’ve increased your conditioning volume, you can begin increasing the intensity of your conditioning. Increasing intensity before you have established consistency with conditioning volume is building on a poor foundation.

Increase Conditioning Intensity


Just train harder…that’s all you have to do right?


Unfortunately this is the most common approach but it’s relatively subjective and hard to evaluate perceived effort from week to week.


Training at a higher percentage of your max heart rate is the most reliable and effective way to increase the intensity of your conditioning.


However, you will need to have some idea of what your max heart rate actually is…the formula of 220 minus your age isn’t reliable.


That formula lumps every 40 year old into the same category regardless of their fitness level and health history…not exactly a reliable formula. Every car and every person simply doesn’t have the same motor.


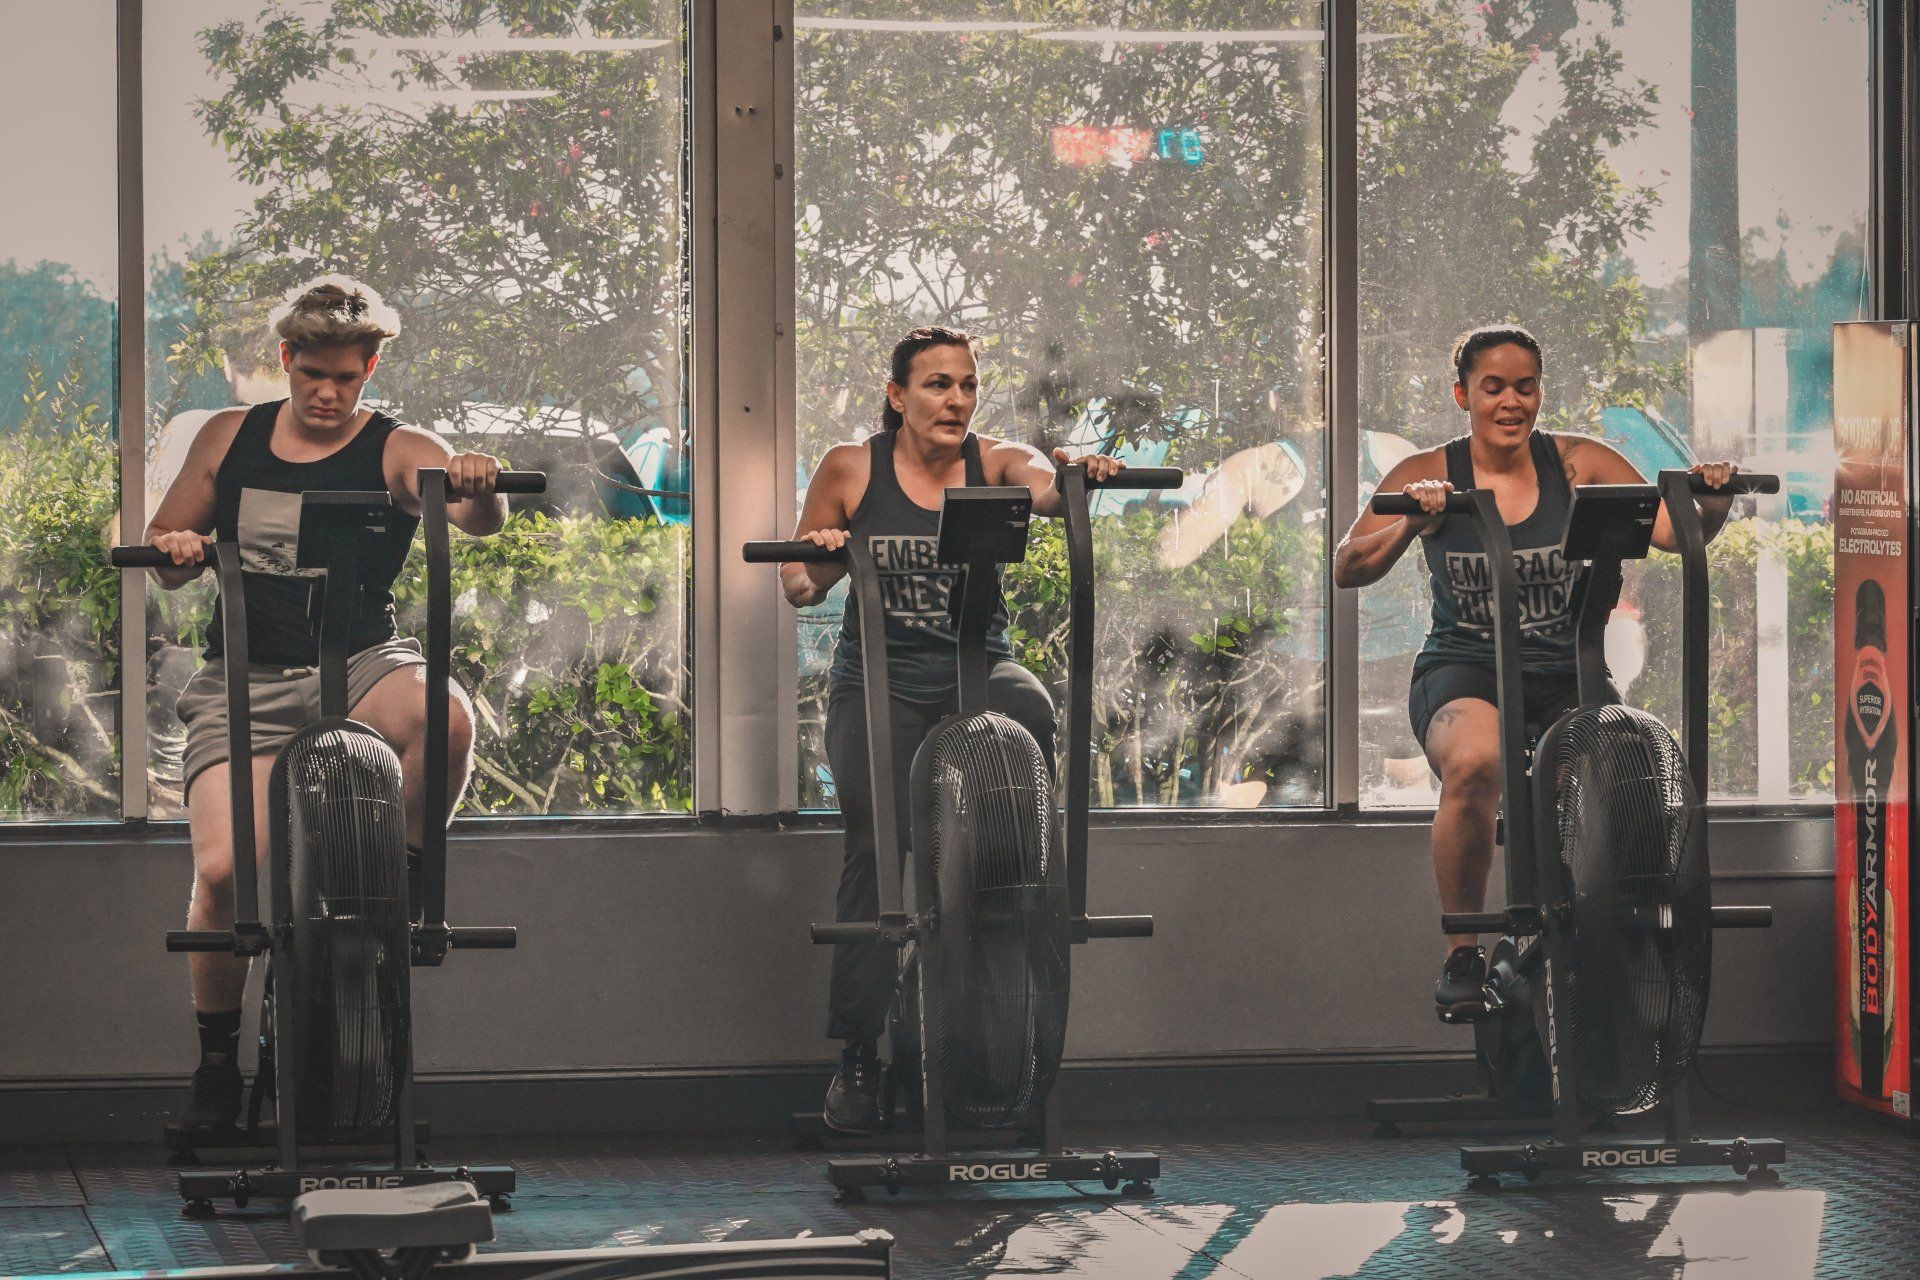
To help determine your max heart rate, you’ll need to perform a fast, full-body exercise such as a 400 meter sprint. If running isn’t an option for you, you could also use a rower or an assault bike.


Heart rate monitors (such as Morpheus, Polar or Garmin) allow you to effectively track your heart rate during your conditioning training. This makes tracking increases in the intensity of your conditioning convenient.


Gradually decreasing your rest intervals or increasing your work intervals on a weekly basis will also allow you to increase the intensity of your conditioning training.

Let’s assume you’re doing conditioning work on a rower.


In weeks 1 and 2, you would increase your intensity for 10 seconds which would drive your heart rate between 130 to 145. Then you would reduce your intensity (still actively training…not resting) for the next 50 seconds bringing your heart rate back between 120 and 130. (Please note that the specific heart rate ranges vary by individual.)


In weeks 3 and 4, you would increase your intensity for 15 seconds with your targeted heart rate between 130 and 145. The next 75 seconds you would reduce your intensity bringing your heart rate back between 120 and 130 beats per minute.


When you are increasing conditioning intensity, you do NOT need to increase the higher intensity interval AND decrease the lower intensity interval at the same time.


In the previous example, the goal is to maintain a 1:5 high intensity to low intensity work ratio to help develop dynamic energy control. This is your ability to regulate the amount of energy expenditure needed to perform. Far too often people begin reducing the ratio of higher intensity work to lower intensity work (or rest) without developing their dynamic energy control.

This is exactly why simply working harder and longer to make yourself more tired doesn’t make you better.


If we are following that same 1:5 high intensity to low intensity ratio and we increased the higher intensity work interval to 30 seconds, we would also need to increase the lower intensity work interval to 2.5 minutes or 150 seconds.


Increase Conditioning Frequency

The 3rd way to improve your conditioning is similar to the 1st. Instead of increasing time, sets or reps, you’ll add in another training session during your week.


When you increase your training frequency, you’ll most likely increase your total volume AND intensity as well. That is why this should be the 3rd lever you pull to improve your conditioning.


You’ll want to improve the capacity of your conditioning by first increasing volume and then intensity. This will give you room to continue your improvement without sustaining injuries when you increase your training frequency.


It can be incredibly tempting to want to increase volume, intensity and frequency all at the same time…this is a great recipe for injuries and overtraining. If you get hurt, you can’t train. If you can’t train, you can’t keep improving.


By gradually increasing the volume, intensity and then frequency of your conditioning training, you are employing the same Minimum Effective Dose strategy that works wonders for strength training.


The Minimum Effective Dose strategy uses the least amount of training necessary to improve, progress or elicit the desired response. If you had a headache, you can take 2 aspirin…you don’t need to take the whole bottle.


If you’re just getting started trying to improve your conditioning, take 4 to 8 weeks to increase the volume of your training.


Once your performance starts to plateau, you can begin to increase the intensity of your training over the next 4 to 8 weeks.


Again, once performance stalls, you can then ramp up the frequency of your training to continually improve your conditioning.


Hopefully these strategies help you take a smarter approach as you work to improve your conditioning.


About No Limits

No Limits Fitness provides step-by-step programs to help busy adults get the body they’ve always wanted, without restrictive diets or time-consuming workouts, so they can lead more fulfilling lives. Life is a much better experience in a strong, healthy body!

Recent Posts

By Will Matthiessen 19 Apr, 2024
Crunches.  The go-to core exercise for a lot of gym goers. Yet, it’s one of the worst ab exercises you can do. Shocking, I know. You’re probably wondering why it’s one of the worst. Crunches put force on your spine and oftentimes strain on your neck. They force your spine into flexion, which is generally what people are told not to do in order to protect their back. Aside from the pressure it puts on your spine, crunches don’t activate your core muscles to the extent that a lot of other dynamic core exercises do. If your goal is to have sculpted abs like a lifeguard on Baywatch, crunches are not your solution. Aside from the aesthetic aspect, a strong core is important for your body’s balance and stability, posture, and reduction of back pain and other injuries. If you want to develop a rock hard core, here is a list of exercises better than the old fashioned crunches that you can start incorporating into your workouts: The Hard Style Plank Put your forearms on the ground and your arms set shoulder width apart. Your arms should be parallel to your body. Once you’re up in the plank, imagine squeezing your elbows to your knees and your knees to your elbows. Don’t be surprised if you start shaking like a leaf as soon as you create that tension. Dead Bugs Lie on your back with your arms straight up and your hands above your shoulders. Bend your legs at a 90-degree angle with your toes facing up at the ceiling. Imagine pushing your belly button into the ground and keeping your body tight enough to where if someone was pulling on your limbs, you’d be able to resist it. Next extend your right arm and left leg at the same time, without touching the ground. Keep pushing your belly button into the ground to avoid arching your back. The right leg that is still bent should stay completely still while the other leg is in motion. Bring your arm and leg back into the start position and then switch sides. When it comes to Dead Bugs, one of our favorite sayings applies: “Slowly is holy. Faster is disaster.” If you want to increase the intensity, add a kettlebell to the stationary arm. If you want to significantly increase the intensity, press the kettlebell once you’ve reached the fully extended position. Reverse Crunches Lie down flat with your back on the floor and your legs straight down, toes pointed up. Press your lower back into the floor and pull in your belly button as you lift your legs together up off the floor. Push your heels through the ceiling at the top and slowly lower them back to the ground. Fun, right? Double Kettlebell March Hold two heavy kettlebells in the racked position. Pull your belly button to your knees and your knees to your belly button to find max tension in your core. Once you feel that tension, slowly lift one knee up 90 degrees and then switch legs. Hollow Rocks I’ve saved the worst (I mean best) for last. Lay down on the ground with your legs a little bit off of the ground as well as your shoulder blades and head. With arms extended over your head, rock back and forth like a banana rocking back and forth on a counter. Or a see-saw…take your pick. Alright, now that I’ve given you the secret sauce to getting rock hard abs, it’s time to get to work people!
By Juan Perez 05 Apr, 2024
One of the first recommendations you’ll hear for someone wanting to lose weight is to begin by counting calories. Although weighing your food and counting calories does work for some people, the reality is that this approach to weight loss has an astonishingly high failure rate. If this strategy is “based in science”, why does it fail more than 95% of the time? The Top 3 Issues With Counting Calories The number of calories in the foods you eat are estimates. This is where the concept of counting calories being “based in science” can be misleading. The FDA allows companies to use 5 different formulas to estimate calories and a standard deviation up to 20% is acceptable. This means that something listed as 150 calories exists on a range between 120 calories and 180 calories. How ripe is your banana? The ripeness affects caloric availability. The second issue is that as individuals we each absorb a different amount of the calories from the food we consume. Thirdly, Americans are notoriously bad at determining healthy portion sizes. Our super-sized culture has heavily influenced our concept of a normal sized portion. The good news is that there is another way to lose weight without counting calories. The Three Pillars of Nutrition Whether or not you’re a card-carrying member of Camp Calorie Counters, the foundation of your nutrition is built upon three pillars: Food Quality, Food Quantity and Food Timing. Food Quality All calories are not created equal. The popular 100 calorie snack bags do not offer the same nutritional value as 100 calories from fruits or vegetables. When the majority of your meals are composed of minimally processed single ingredient whole foods (lean protein, fruits and vegetables), you’re more likely to get the micronutrients your body needs to thrive. Food Quantity As mentioned earlier, Americans aren’t known for our skills at eyeballing healthy portion sizes. Although using a food scale to determine portion sizes can be helpful, it isn’t always practical. This is the reason we recommend learning to use your hand as a guide to determine portion sizes. You can’t take a food scale with you everywhere you go but you’re always allowed to bring your hands!
By Chava Cruz 07 Mar, 2024
There are six fundamental movement patterns that every good program will include. Push, pull, hinge, squat, lunge, and loaded carry. These are all everyday movements that our bodies need in order to function more efficiently. Push Incorporating a variety of push exercises like the bench press, shoulder press, triceps presses and push-ups will help strengthen your upper body muscles. These exercises primarily target our chest, shoulders and triceps. Don’t want the wings under your arm that shake real bad when you wave? Start pushing.  We use push movements with tasks as simple as pushing doors open and pushing grocery carts to more difficult tasks like lifting ourselves up from a seated position. Pull Pull exercises are the counter to push, creating a balance. They primarily target our back, biceps and rear delts. It is crucial to have just as many pulls in your plan to avoid injury and overuse of your upper body muscles. Some popular pull exercises include bent over rows, single arm row, lat pull downs and trx rows. Aside from your muscles getting stronger, these exercises will improve your posture and help you pick things up like kids and animals. No kids or animals? You still have to pick up groceries or laundry, nice try. Hinge Hinging is something we do often without realizing it. It primarily targets our hips, lower back, glutes and hamstrings. Some of the most common hinge exercises are deadlifts, kettlebell swings, and hip thrusts. Performing hinge movements will help improve your stability, flexibility and hip mobility on top of strengthening your lower body. The more mobile and flexible you are, the easier it is to move. Hinge exercises will also stabilize your core muscles which is the root of everything. Daily tasks that mimic the hinge movement are bending over to lift heavy objects and bending to prepare to sit or stand. Squat Similar to pull being the counter to push.. The squat is the counter to hinge. You shouldn’t have one without the other. It’s kind of like having a plate of food without the silverware. You could do it, it’s just going to get messy. Squats primarily target the quads, hamstrings and glutes. Some of the most common types of squats include goblet squat, back squat, front squat, overhead squat and sumo squat. Performing these exercises will strengthen your lower body muscles and improve your core and stability. Daily tasks that involve squats include lifting heavy objects (after you’ve performed a hinge to go and get it), sitting down and standing up. Lunge Everyone's favorite, lunges. Aside from creating rock hard quads, the lunge is essential to a functional body and injury prevention. Reverse lunges, forwards lunges, lateral lunges and split squats are all examples of what you can incorporate into your program. Imagine falling and not being able to get back up. Not everyone wants to rely on life alert. Practicing and staying consistent with lunges will help allow you to avoid a fall in the first place because of the stability they create, but also to be able to actually get yourself up off of the ground when you need to. Loaded Carry Ah, loaded carries. You either hate them or love them but either way you’re going to be stuck doing them at some point. Loaded carries create a strong core which in return helps with your balance and stability. They will also improve your grip strength. Carrying groceries from the store to your car becomes a lot easier the more you practice these. Different types of carries include farmers, suitcase, racked, overhead, and mixed. We carry things every single day and we do it in different ways depending on the object. Include a variety of carries in your program so you’re prepared to carry anything. Conclusion Performing all six of these movement patterns every week will ensure that you are moving better day to day. The better we function and move properly, the better we feel and the healthier we will be. If you would like to meet with one of our experienced personal trainers to discuss incorporating these 6 movement patterns in your training program, click on the button below to schedule a free consultation.
Show More
Share by: